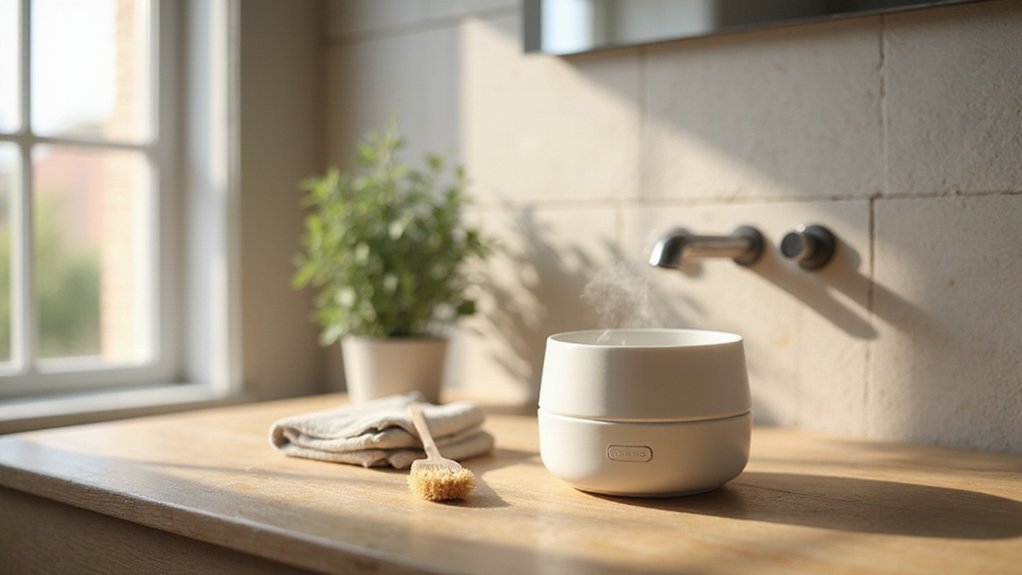
How to Clean an Essential Oil Diffuser
If you’re wondering how to keep your essential oil diffuser working its best, regular cleaning is key. Over time, oil residue and mineral buildup can affect how well it disperses scent and even cause mold.
The good news is, with simple steps, you can easily maintain your diffuser and prolong its life. In this guide, you’ll learn straightforward techniques to clean your diffuser thoroughly, preventing issues and ensuring it runs smoothly.
Keep reading to find out how to keep your diffuser in top shape with minimal effort.
Why You Can’t Skip Cleaning Your Diffuser
Cleaning your diffuser regularly is essential because standing water creates a breeding ground for mold and bacteria. If you ignore this step, you risk dispersing germs into your indoor air, which can affect health and air quality. Additionally, residue from essential oils builds up on the ultrasonic plate and interior parts over time. This buildup can clog your diffuser, reducing mist output and making it louder during operation. You may hear grinding sounds or notice weaker performance, indicating your device isn’t working efficiently. Left uncleaned, corrosive residues can also shorten your diffuser’s lifespan and lead to costly repairs. To keep your diffuser functioning properly, use soft cloths, cotton swabs, and mild vinegar or rubbing alcohol to wipe down the tank, lid, and mist outlet after each use. Similarly, when installing a new device like a smart thermostat, following step-by-step instructions ensures proper placement and avoids errors that could affect performance. For a more comprehensive approach to improving indoor air, you can also consider building a DIY air purifier using simple household materials. Regular cleaning prevents mold growth, maintains optimal performance, and keeps the air in your space fresh. Choosing a low profile design for your ceiling fan can also help maintain consistent airflow without adding unnecessary visual bulk to a room.
How Often to Clean: Daily, Weekly, or Monthly
Your cleaning frequency should match how often you use the diffuser. For daily use, empty and wipe the reservoir after each session to prevent residue buildup and scent carryover. If you frequently switch oils, this daily step helps keep scents separate.
For moderate use, a weekly cleaning with diluted vinegar maintains the mist output without requiring a full deep clean. If you use your diffuser less often, cleaning it every two weeks is usually sufficient. To minimize grime, always use fresh, clean water rather than letting tap water sit in the tank between uses.
Monthly deep cleaning is recommended to remove dust and buildup that could affect performance. Essential oil cool mist humidifiers can also develop mineral deposits that require more frequent attention. If you rarely use your diffuser, a monthly clean should suffice. Pay attention to signs like reduced mist or louder operation, which indicate cleaning is needed sooner. Adjust your routine based on these observations. This process is similar to checking correct placement and setup to ensure optimal performance from the device.

Top selling essential oils set: We create our essential oils using rigorously tested ingredients. Top blends, make pampering a luxurious experience with our set of 6 10ml oils. Perfect for blending to make candle making scents, making DIY soap scents or a unique aromatherapy experience. Join 170,000+ customers who love our essential oils for diy crafts, aromatherapy and candle making!

PREMIUM AIR FRESHENER: An elegantly designed wall plug in with fluted, glass refill jars and your favorite fragrances inspired by the garden.

Essential Oil Blends: Introduce the long-lasting, pleasant, and relaxing aroma to your home with our Well-being aromatherapy diffuser oils set! Happy, Calm Mind, Air Freshening, Relax, Immunity, and Sweet Dreams inclued for your well-being and happy life
Quick Routine Clean With Vinegar in 10 Minutes
Drain the solution immediately after cleaning. Use a soft cloth dampened with vinegar or water to wipe the interior, paying attention to the shape and material of your diffuser. For tight spots around the sensor or hard-to-reach areas, a cotton swab works well. This vinegar effectively reduces orangey residue that can accumulate from essential oils. Rinse the tank thoroughly with clean water to remove any residual vinegar or debris, then wipe it dry with a soft cloth. Allow the tank to air-dry completely before refilling to prevent moisture buildup. This quick cleaning process provides flexibility in your maintenance schedule, so you can adjust how often you clean based on the diffuser’s condition. Unlike programmable thermostats that rely on fixed schedules, your cleaning routine should adapt to how frequently you use the diffuser. Skip the deep-clean steps if your diffuser seems clean enough and you want to save time. For persistent buildup, consider using a mild detergent solution similar to how window air conditioners benefit from regular filter cleaning. Also, always unplug the diffuser before cleaning to avoid electrical hazards and protect its components.

100% PURE & NATURAL LEMON OIL: Handcraft Blends oils are exactly that! Many other oils claim that but are actually isolates and mixtures. Each oil is tested by an independent lab, so every bottle has a Quality Guarantee.

100% PURE & NATURAL LEMON OIL - NaturoBliss oils are exactly that! Many oils being sold online make that claim but are in fact made of natural isolates and mixtures. Each essential oil is tested by an independent lab which is why every bottle comes with a Quality Guaranty.

Peppermint Essential Oil - SU JUABA Peppermint Essential Oil is extracted through steam distillation. Perfect for aromatherapy, diffusers, and skin care, it provides a refreshing and invigorating experience
How to Deep-Clean the Ultrasonic Chip and Crevices
To deep-clean the ultrasonic chip and crevices, start by unplugging the diffuser and emptying all water. Use a cotton swab dipped in rubbing alcohol to gently clean the ultrasonic chip. Apply only light pressure to avoid damaging the sensitive surface and wipe until the oil film is visibly removed. Dry the area thoroughly to prevent moisture buildup. Regular maintenance of this component is essential since, unlike top space heaters that rely on fan-driven heating elements, ultrasonic diffusers depend on this delicate vibrating disc for proper function. Using a dehumidifier can also help reduce excess moisture that attracts pests like centipedes into your home.
For crevice cleaning, target the edges, corners, and seams around the reservoir with a fresh cotton swab. Use a small amount of white vinegar or rubbing alcohol to dissolve built-up oil. Be careful not to force liquid into air outlets or control buttons. Focus on tight areas near the ultrasonic chip, where grime can cause malfunction or shutdown. Gently clean any sensor pins as well. After cleaning, leave the diffuser open to air dry completely before reassembling. Finally, test the unit with plain water to ensure that the chip and crevices are clear. For comparison, whole-home air purifiers use different cleaning mechanisms that require their own specific maintenance routines.

INDIVIDUALLY WRAPPED MEDICAL ALCOHOL PREP PADS: Our CURAD Alcohol Prep Pads are individually sealed in easy-to-open foil-lined packets. This keeps them sterile and saturated until you need to use them.

Alcohol swabs Made of environmentally friendly materials, safe.Safely clean newborn's belly button, toes and nose.Particularly suitable for electronic IT industry, do not fall dust, cotton head is not scattered, excellent quality.

Wrapped Individually: Each Alcohol Cotton Swab is individual, which is more sanitary and cleaner, easy to take it on the road.
How to Clean the Exterior and Removable Parts
Once the interior is fully dry and clear, unplug the diffuser and focus on cleaning the exterior and removable parts. Use a soft microfiber cloth dampened with plain water or rubbing alcohol—70% to 90% concentration— for effective exterior maintenance. Gently wipe away fingerprints, smudges, and oily residues from the housing and top surfaces, but avoid abrasive cleaners that could damage the finish. Unlike bladeless fan designs that require different maintenance approaches, the exterior of a diffuser is simpler to clean. For routine upkeep, regular cleaning prevents clogs and ensures consistent mist output throughout the diffuser’s lifespan. Detach the lid or cover to clean the removable components. Wash these parts separately in warm, soapy water, then rinse thoroughly to eliminate soap residue. Use a cotton swab or soft cloth to reach corners and walls inside the reservoir. After cleaning with vinegar or soap, rinse the reservoir with clean water to prevent soap film buildup. Be careful to keep moisture away from the air outlet and the underside of the diffuser. Dry all parts completely before reassembling, making sure no water remains on the electrical base to prevent any damage. For best results, choose a diffuser with quality and performance features that match your room size.

FRAGRANCE: Indulge in the scent of a perfect pumpkin pie, filled with sweet pumpkin, warm baking spices and topped with homemade whipped cream

Fresh Home Set (10mlx6): Experience the clean and freshening scents of our Fresh Home Essential Oil Set- Fresh Linen, Clean Home, Fresh Laundry, Crisp Breeze, Pure Soap and Lemon, each 10ml bottle delivers a clean, airy aroma that instantly freshens any space-perfect for summer or creating a clean, inviting home atmosphere

FRAGRANCE: This gentle fragrance is a combination of fresh juicy red apples, freshly ground warm cinnamon and spicy nutmeg with sweet vanilla and warm woody notes
How to Dry and Reassemble Your Diffuser
To dry and reassemble your diffuser, start by turning off and unplugging the unit. Empty any remaining water and oil from the reservoir. Wipe the tank with a dry microfiber cloth to remove moisture, and use a cotton swab to gently dry the ultrasonic plate, taking care to avoid scratching it. Allow all parts, including vents and seams, to air-dry completely to prevent mold growth. This routine maintains mist quality by preventing residue buildup on the plate. Understanding how ultrasonic technology works helps you appreciate why careful drying of the plate is essential for long-term performance. A similar principle applies to bedroom dehumidifiers, where regular drying of internal components prevents moisture-related damage. For spaces concerned about air quality, also consider the operating cost and maintenance of devices like ionizers to compare long-term value.
Only reassemble once all components are fully dry. Follow the manufacturer’s order for reattachment, ensuring the lid and cap sit correctly. If you detect a vinegar or alcohol smell, wait longer before reassembling, as residues can interfere with proper operation.
Next, run a water-only test cycle to verify that the mist and airflow are functioning normally. If the mist seems weak, check for any lingering moisture in the reservoir or a misaligned lid. Always dry and empty the unit after testing before storing it unplugged and in a dry place, ready for its next use.
How to Prevent Mold and Buildup Between Cleans
To prevent mold and buildup between cleans, empty the diffuser’s reservoir immediately after each use. Standing water promotes mold and mildew growth, so avoid letting it sit. Replace old water with fresh water instead of just topping off to minimize residue. Keep indoor humidity levels between 30% and 50%, as higher humidity above 60% creates condensation that encourages mold growth. For example, a dehumidifier can help maintain these levels by removing excess moisture from the air. Use air quality monitoring devices to track moisture levels and adjust your environment accordingly. After shutting down the diffuser, wipe the tank dry to remove residual moisture. Clean the reservoir at least once a week or after every three uses, choosing cleaning agents compatible with your diffuser material—distilled white vinegar works well for most surfaces. Before each use, inspect the reservoir with a flashlight to detect early signs of buildup. When storing the diffuser, clean and thoroughly dry it to prevent mold from developing during periods of inactivity.

Compact and Versatile - Our small oil diffuser is designed to be compact and versatile, making it suitable for various spaces and lifestyles. Aromatherapy diffusers sleek and portable design allows you to easily move it from room to room, enabling you to enjoy aromatherapy wherever you go. Whether you want to create a soothing ambiance in your bedroom, living room, office, or even during travel, an aroma diffuser is a nice choice.

60 HOURS OF RUNTIME: The 0.66-gallon tank delivers up to 60 hours on the low mist setting. Medium and high settings use more water and may require more frequent refills.

Reminder: To ensure proper mist function, please do not refill under tap (use measuring cup only to prevent circuit damage); keep water covering atomizer but below MAX line; power off before refilling to prevent water leakage; DO NOT drain from air outlet, ONLY drain from drain side to prevent water ingress and circuit damage.