How to Use a Humidifier: A Simple Guide
If you’re wondering how to keep your air comfortably humid without hassle, using a humidifier might be the answer.
A well-placed, properly maintained unit can help improve air quality and ease dry skin or congestion.
By the end of this, you’ll know exactly how to set up, operate, and care for your humidifier for the best results.
Place Your Humidifier on a Flat Surface Away From Walls
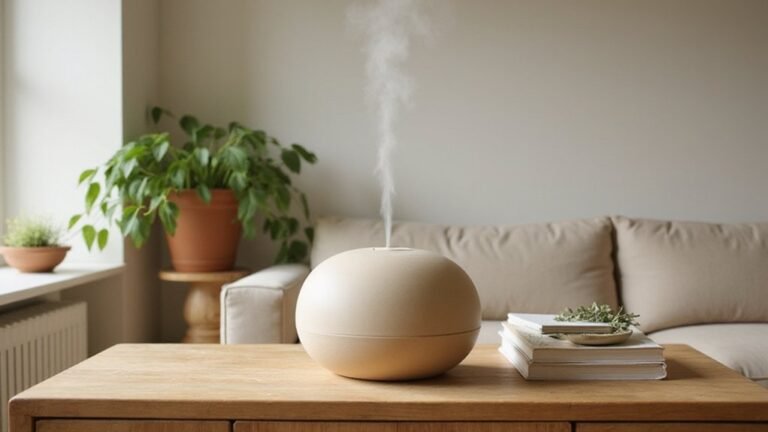
Place your humidifier on a flat, stable surface like a nightstand or dresser, positioned at least 12 to 36 inches away from any wall. This distance prevents condensation from collecting on walls or furniture and protects paint or wallpaper from moisture damage. Elevating the unit 2 to 3 feet above the ground promotes better mist circulation and even humidity distribution. Use a protective mat underneath to keep the surface dry and avoid water damage. Keep the humidifier away from electronics and high-traffic areas, maintaining a distance of 3 to 6 feet from your bed or other personal spaces for safe and effective operation. Proper placement ensures your humidifier works efficiently while keeping your environment safe. Ensure the unit is not placed near a window or door to avoid fluctuating temperatures that reduce efficiency, as correct placement is crucial for performance. For optimal effectiveness, aim mist directly into the open space rather than at any surface. A ceiling fan can complement your humidifier by improving air circulation and preventing stagnant moisture. Unlike a dehumidifier, which removes excess moisture, your humidifier adds it, so monitor humidity levels with a hygrometer to avoid over-humidifying the room.

Designed to fit most standard humidifiers, this drain pan measures 10 x 10 inches and offers reliable floor waterproof protection. To ensure proper fit, please measure the dimensions of your humidifier carefully before purchasing, and compare them with the size of this mat to confirm compatibility

💦Large Surface Coverage: Provide ample space beneath room humidifiers, helping protect desks, countertops, hardwood floors, and carpeted areas from everyday drips and moisture

【DIMENSIONS】9" top outer width × 8.5" bottom diameter × 0.79" depth (Please refer to the size image for detailed measurements.)
Fill the Tank With Distilled Water to the Marked Line
Ensure you fill the tank only up to the manufacturer’s marked maximum line. This makes precise fill line accuracy crucial, as overfilling can cause spills during reassembly and allow water to enter areas where it shouldn’t go. Staying at the line maintains consistent mist output and prevents handling issues. First, unplug the unit, then pour slowly until you reach the mark. Secure the cap tightly afterward to prevent leaks. Following this simple step safeguards your device and reduces cleaning time later. For proper cooling performance, it is important to follow a similar level of precision when installing a window air conditioner to avoid water leakage. For water damage restoration, a dehumidifier must be robust enough to handle continuous moisture extraction without overflowing. If you prefer a gentler, flameless aroma for your space, consider using a reed diffuser for consistent fragrance without the need for power or monitoring.
Set Humidity Between 30 and 50% for Comfort
Adjust your home’s humidity to stay within the 30% to 50% range for optimal comfort year-round. In winter, set your humidifier or dehumidifier to around 30% to 40% to prevent window condensation and reduce the risk of mold growth. During summer, increase the setting to 40% to 50% to maintain a comfortable level and avoid dryness or stickiness. A dehumidifier is most effective when placed in a central location for balanced air circulation. Use a hygrometer to monitor humidity levels in main living spaces regularly. If the air feels too dry or you notice static or cracking, raise the humidity slightly. Conversely, if the air feels humid, sticky, or you see condensation on windows, lower the setting. For best results with your device, follow correct use guidelines to prevent common mistakes. Always recheck humidity after adjustments to ensure it remains within the 30% to 50% comfort band. An air purifier can help remove airborne particles that thrive in improper humidity, complementing your humidifier’s efforts.

Wellness Indicator: This humidity meter with humidity level icon indicates air conditions - DRY/COMFORT/WET, allowing this humidity sensor to ensure you’re always aware of changes to your home/household with just a quick glance

Face Icon Comfort Indicator: Humidity temperature gauge features face icons to indicate DRY/COMFORT/WET air conditions, quickly informs you how to adjust your humidifier or dehumidifier to achieve optimal comfort.

Real-Time Precision Monitoring with High Accuracy Sensors: Built with high-precision sensors, this indoor thermometer hygrometer delivers real-time temperature and humidity monitoring with reliable accuracy. It features a wide measuring range from -58°F to 158°F (±1.8°F accuracy) and 10%–99% RH humidity range (±5% RH accuracy). Providing stable data for daily home monitoring.
Empty and Clean the Tank Every Day to Prevent Mold
You should empty your humidifier’s tank every day. Standing water can foster mold and bacteria growth within just one to two days. After each use, unplug the unit, drain all remaining water, and shake out any residual moisture. Wipe all surfaces dry with a clean towel. Then, leave the tank open to air-dry completely before refilling or storing. This daily routine prevents biofilm formation, reduces unpleasant odors, and stops mold spores from dispersing into your air. Always refill with fresh water—never reuse leftover water. Skipping this step increases the risk of mold buildup and microbial growth, especially if you run the humidifier continuously or have respiratory sensitivities. It’s a quick but vital step in keeping your air clean and your humidifier safe. Additionally, using distilled water in your refill prevents mineral buildup that can damage the humidifier over time. For a deeper clean, periodically soaking the tank with a vinegar solution helps remove mineral deposits and kill lingering bacteria. Using a model designed for cough relief can also provide targeted moisture when you are sick. If you need to cool a vehicle instead, consider portable air conditioners designed specifically for cars.

Dual Care Routine: Keep your humidifier fresh through both everyday use and scheduled maintenance. These Humidifier Cleaner Drops support quick care during regular refills while also providing a thorough cleaning option every few weeks. Ideal for bedrooms, nurseries, offices, or living spaces where consistent humidity matters. This easy-to-use humidifier cleaner solution helps simplify maintenance without requiring multiple cleaning products
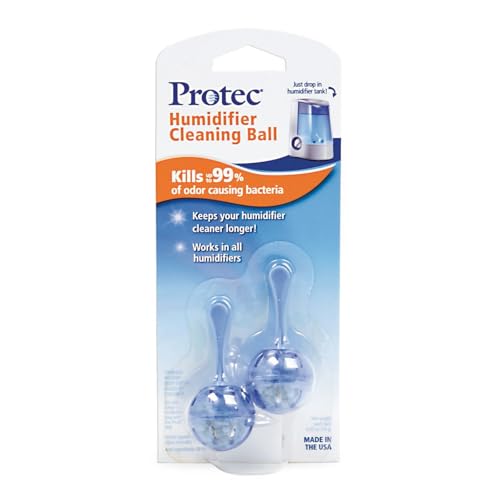
Works with all humidifiers; safe and non-toxic

Continuous cleaning: This humidifier water filter cartridge helps keep your humidifier cleaner longer
How to Clean Your Humidifier With Vinegar or Detergent
To clean your humidifier with vinegar or detergent, start by unplugging the unit and removing all detachable parts. For vinegar cleaning, prepare a solution of equal parts white vinegar and water, then soak the removable parts for 15 to 30 minutes to loosen mineral buildup. If there is heavy crusted mineral scale, use undiluted vinegar directly on those areas. After soaking, scrub the parts gently with a soft brush to remove residue. Rinse all parts thoroughly with clean water to eliminate any vinegar smell or residue. Air-dry all parts completely before reassembling to prevent mold growth. When using detergent, opt for mild soap and warm water, cleaning only the parts that do not require acid descaling. Avoid abrasive cleaners that could scratch plastic components. Always follow the manufacturer’s instructions, especially regarding filters—do not soak filters unless specifically directed, as some are not water-safe. Proper cleaning ensures your humidifier operates efficiently and remains free from mold and mineral buildup. For similar prevention strategies in a bedroom, consider how a bedroom dehumidifier can also reduce moisture-related issues like mold growth. It is also important to never leave a space heater unattended or near flammable materials such as curtains or bedding to avoid fire hazards. For those seeking a cooling solution without moisture concerns, a portable air conditioner without hose offers an alternative that requires no venting or drainage.

5% ACIDITY: Clear distilled white vinegar with a clean, sharp taste

One 16-fluid-ounce bottle of Distilled White Vinegar

Aunt Fannie's Extra Strength All Purpose Cleaning Vinegar: Contains distilled white vinegar specifically formulated for cleaning with 6% acidity; No added scents, dyes, or other additives
Troubleshoot When the Mist Stops: Check Water, Power, and Filter
If the mist stops flowing from your humidifier, the first step is to check the water level. A low tank often triggers an automatic shutoff to prevent damage. Fill the tank to the indicated fill line, not by eye, to ensure proper function. Using distilled water is recommended because tap water can clog the system with minerals and deposits. Also, verify that the tank is seated correctly; a poor fit can cause the unit to misread the water level, leading to a false low-water warning that halts mist production. Sensor calibration is important—if the float or water-level sensor misreads, the humidifier will think it’s empty even if it isn’t. For example, ultrasonic models provide better respiratory comfort by producing a fine, cool mist that doesn’t require heating. Using a different electrical outlet can confirm if the power source is faulty. For homes with smarter systems, comparing smart thermostat settings can help ensure your humidity controls are optimized alongside the humidifier. Regularly cleaning the fan blades can prevent mold and buildup that may affect airflow.
Next, check the power connection. Confirm that the plug is fully inserted into a working outlet. For safety, unplug the humidifier before performing more detailed checks. Power-cycle the unit by turning it off, unplugging it, and then plugging it back in after a few seconds. This simple step can reset the electronics and sometimes resolve the issue. Finally, inspect the filter. A clogged or mineral-crusted filter can block airflow, stopping mist production. Clean washable filters weekly and replace them if they are stiff, stained, or heavily mineralized. Following this sequence—water level, tank seating, power connection, and filter condition—addresses the most common causes of mist stoppage efficiently.

Distilled Water When You Need It: Pure Life’s Distilled Water helps prevent mineral buildup, making it ideal for multiple uses, including in household appliances that require distilled water to run at peak efficiency. One 1-gallon jug.

400+ USES PER 2-PACK — Two bottles deliver 400+ tank treatments. Cents per use vs. $20 replacement cartridges or demineralization pods. The most cost-effective humidifier maintenance routine on Amazon.

𝙁𝙖𝙨𝙩 𝙃𝙪𝙢𝙞𝙙𝙞𝙛𝙞𝙘𝙖𝙩𝙞𝙤𝙣 𝘼𝙡𝙡 𝙉𝙞𝙜𝙝𝙩: Runs for up to 25 hours on low thanks to its SUPER LARGE capacity of 2.5 liters. The soothing moisture helps quickly relief congestion and dry throat.