How to Clean a Humidifier
Wondering how to keep your humidifier clean and safe to use? Regular cleaning is essential to prevent mold, bacteria, and mineral buildup that can harm the air you breathe.
With simple steps like rinsing, descaling, and drying, you can keep your device running smoothly and your air healthier.
Keep reading to find out the best way to maintain your humidifier properly.
Why Cleaning Your Humidifier Prevents Mold and Allergies
Cleaning your humidifier regularly is essential because stagnant water can develop mold within just 24 to 48 hours. If you skip cleaning, you risk introducing airborne contaminants like mold spores and bacteria into your home environment. The warm, damp reservoir of the humidifier provides an ideal breeding ground for microbial growth, including harmful bacteria like *Legionella*. When the contaminated mist is released into the air, you may breathe in these pathogens, which can worsen asthma symptoms and trigger allergic reactions. Mold exposure can also negate the health benefits that prompted you to use a humidifier in the first place. In contrast, window air conditioners also require routine maintenance to prevent mold and ensure efficient cooling. For a similar reason, using a bedroom dehumidifier can help control excess moisture that fuels mold growth. Regular cleaning disrupts this cycle by removing the moist film that supports microbial growth. Understanding how a sealed refrigeration system works explains why removing that moisture is crucial for preventing microbial buildup. Wiping the tank and base thoroughly prevents mold spores from becoming airborne, thus safeguarding your respiratory health and maintaining good indoor air quality.

Dual Care Routine: Keep your humidifier fresh through both everyday use and scheduled maintenance. These Humidifier Cleaner Drops support quick care during regular refills while also providing a thorough cleaning option every few weeks. Ideal for bedrooms, nurseries, offices, or living spaces where consistent humidity matters. This easy-to-use humidifier cleaner solution helps simplify maintenance without requiring multiple cleaning products
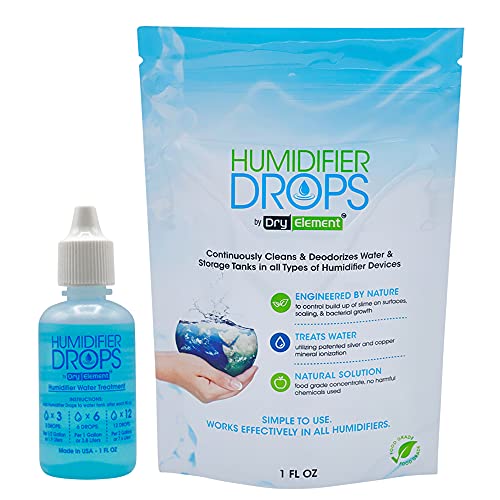
THE ORIGINAL FORMULA: We are the first and the only true authentic humidifier treatment solution on the market. We thank our customers for their trust and support

1 case of 3 Packs, 3 Count Total
Step 1: Unplug, Disassemble, and Drain All Water
Unplug, disassemble, and drain all water before cleaning your humidifier. First, unplug the unit from the wall outlet to avoid any risk of electrical shock from standing water. Fully disassemble the humidifier by removing the tank, base, and any detachable parts, following your manual’s instructions for releasing tabs or removing trays. Take out the filter separately for future maintenance. Then, drain all water: empty the tank completely and carefully tilt the base to pour out the reservoir’s standing water, keeping the motor housing dry. This step is essential to maintain water quality and prevent mold or bacteria buildup. Unlike a dehumidifier, which uses refrigerant coils to condense moisture from the air, a humidifier adds moisture and requires thorough draining to avoid stagnation. For cough relief, a clean humidifier is particularly important to reduce airborne irritants that can trigger symptoms. Once drained, ensure all electrical components remain dry. When your unit is emptied and disassembled, it is ready for thorough rinsing. Always verify everything is dry, unplugged, and prepared before moving on to the next cleaning step. Using a damp machine stored without drying may trap moisture and foster bacteria growth. Before draining, check that the unit is placed on a level surface to ensure all water flows out completely.
Step 2: Rinse Parts to Remove Loose Debris First
Rinsing all removable parts with warm water is essential to remove loose debris before proceeding. Use warm water—around 100°F—to gently lift surface buildup without the need for soap. Fill the tank, swish it vigorously to loosen dirt, and then empty it. Repeat this process until the water runs clear, ensuring all loose particles are expelled. However, be aware that electric space heaters should never be rinsed or come near water to avoid shock hazards.
For the base, avoid submerging it entirely. Instead, pour water into it, gently shake or agitate to loosen debris, and then tip it out, taking care to keep moisture away from the motor housing. Small components, such as filters or nozzles, should be rinsed under running water until any visible grit disappears. This initial rinse prepares surfaces for descaling by loosening corner grime, making later cleaning more effective. Selecting a unit with high-quality filtration can reduce the frequency of deep cleanings needed.
Drain all parts completely and inspect joints, openings, and seals. Rinse again if you notice any residual residue. Proper rinsing now prevents particles from spreading into the vinegar soak later, ensuring a thorough cleaning process. For ongoing maintenance, clean the filter every few weeks to prevent mold and buildup.
Step 3: Soak Tanks in Vinegar for Routine Descaling
After rinsing away loose debris, soak the tank and removable plastic parts in a white vinegar solution to dissolve hard-water scale. Use equal parts of distilled white vinegar and water for routine cleaning. For more stubborn buildup, increase the vinegar concentration to undiluted white vinegar. Fill the tank completely, swirl to coat all interior surfaces, and be sure to include the base reservoir, but avoid electrical components. Adjust the soak time based on the scale level: 15 to 20 minutes for light deposits, 20 to 30 minutes for moderate buildup, and up to 60 minutes for stubborn lime scale. Fill the water tank with half to 1 cup of vinegar and 1 cup water, then shake the solution inside to ensure contact with all surfaces for effective cleaning. For particularly heavy scale, consider that similar methods are used in air purifier maintenance to remove accumulated pollutants. Once soaking is complete, pour out the solution and gently scrub with a soft brush. Rinse all parts thoroughly under running water until the vinegar smell fades, then let them air dry before reassembling. To prevent mold growth, also clean the fan blades and grille with a damp microfiber cloth during routine maintenance. Regularly wiping down the exterior housing with a vinegar-dampened cloth helps reduce surface residue that can attract dust and spores.

One 16-fluid-ounce bottle of Distilled White Vinegar

5% ACIDITY: Clear distilled white vinegar with a clean, sharp taste
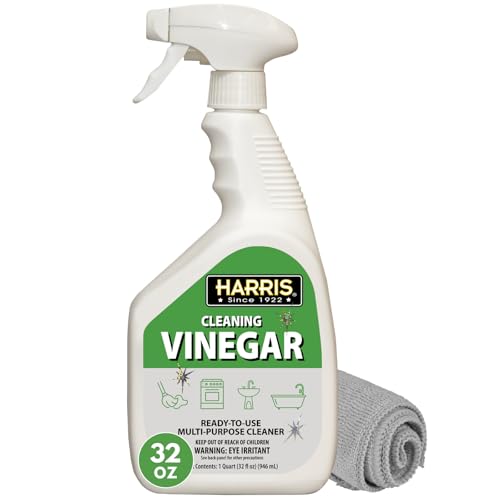
Pre-Mixed & Ready To Use: This effective & easy vinegar spray bottle powerfully cuts through grease & grime—no diluting required
Step 3B: When Vinegar Isn’T Enough-Disinfect With Bleach
If vinegar isn’t enough to disinfect, bleach is your next step. First, unplug the unit and work in a well-ventilated space. Mix 1 teaspoon of liquid chlorine bleach per gallon of water, or follow your model’s specific instructions. Pour the solution into the tank, swish to coat all interior surfaces, and let it sit for 15 to 20 minutes. Be sure to also treat the base and any removable parts that contact water or mist. Using a warm mist humidifier with a heating element may require more frequent disinfection to prevent mineral buildup. This process is similar to cleaning a dehumidifier, where you must also prevent mold from growing in the standing water. For improved air movement during drying, consider using an air circulator instead of a standard fan.
Always wear gloves to protect your skin, as bleach can cause irritation. Never mix bleach with vinegar; this creates dangerous chemical reactions. Consider the environmental impact—don’t pour leftover bleach solution down storm drains. After soaking, empty the tank completely, then rinse thoroughly with water until no bleach smell remains. This indicates the disinfection process is complete and the unit is safe to use again. Soaking smaller parts like rubber gaskets in a separate bowl of the same solution ensures they are fully submerged for effective disinfection.
![AMAZE Ultra Concentrated Bleach Tablets – Meadow Scent [32 tablets] | For Laundry Toilet and Multipurpose Home Cleaning. No Splash, No Spills. Liquid Bleach Alternative. Compact & Easy to Use.](https://m.media-amazon.com/images/I/41ZY+cP8wZL._SL500_.jpg)
LIQUID BLEACH ALTERNATIVE: Use in place of liquid bleach for household cleaning. 73% less packaging and 95% less weight than a bottle of liquid bleach

BLEACH FOR COLORED CLOTHES: Remove tough stains and messes with Clorox ColorLoad Bleach to keep your colors bright and looking like new

✅ Commercial Grade Liquid Chlorine!
Step 4: Rinse Thoroughly to Remove Every Trace of Cleaner
Once every cleaning solution has been drained from the humidifier, you need to thoroughly rinse every part that contacted the cleaner. Run the tank under clean, warm water until you no longer smell vinegar or bleach—that’s your residue detection method. For the base, fill it halfway with water, agitate to loosen residues, then dump. Repeat this process to flush cleaner from all corners. Be careful to keep water away from the motor housing to avoid damage. Small parts like caps and valves should be rinsed under running water, paying close attention to crevices where buildup can hide. This rinsing step isn’t just about cleanliness; it also improves efficiency by preventing residual sludge or film that can force the motor to work harder, much like selecting quality, performance, and value in a remote-controlled ceiling fan ensures long-term reliable operation. If any odor or slime remains, rinse again until all traces of cleaning solution are gone. Once the parts are thoroughly rinsed and residue-free, they are ready to dry. Do not skip this step or rush to reassemble, as a thorough rinse now will help prevent future buildup and maintain your humidifier’s performance. For those interested in drink dehumidifier water, similar thorough rinsing ensures no chemical residues affect the water’s quality. Removing all cleaning agents also helps maintain optimal air quality by preventing those residues from being released into your breathing space during operation.
Step 5: Dry All Parts Completely-No Shortcuts
Once all traces of cleaning solution are gone, you must dry every part completely without shortcuts. This step is crucial to prevent mold and mildew from developing later. Use effective drying techniques to eliminate all moisture: set components on a clean, lint-free towel or a drying rack, making sure they are spaced apart to allow airflow around each part. Place the tank upside down to drain any remaining water. Shake off excess water from all parts and wipe the exterior surfaces with a microfiber towel—do not wipe inside tubes or chambers, as they should be left to air dry. Allow everything to dry thoroughly over several hours, preferably overnight, until no damp spots or droplets remain. Any trapped moisture in seams or corners can lead to mold growth later on. This air drying method is a fundamental infection control practice that prevents the spread of germs. Similarly, running a dehumidifier in the room can help maintain the low humidity levels that centipedes dislike. For large units, focusing on quality and value ensures the drying process does not damage expensive components. Only reassemble the humidifier once you are confident every part is completely dry, with no condensation or dampness remaining. This careful drying process ensures your cleaning effort is effective and long-lasting.
How Often to Clean Your Humidifier (and Stick to the Schedule)
You should clean your humidifier at least once a week if you use it regularly. For daily use, it’s advisable to wash or wipe down the tank and surfaces every day—empty the water after each use, refill with fresh water daily, and dry all surfaces to prevent mold and bacteria growth. Deep-clean with a disinfectant disinfectant once or twice a month, especially if you notice scale buildup, which indicates water hardness issues. The placement of your humidifier also influences maintenance: keep it in a visible spot so you remember to empty it often and perform regular cleaning. At the end of the season, give it a thorough cleaning and discard disposable filters if applicable. Before storing, clean it again to prevent mold during storage and clean once more before reuse. To stay consistent, tie your cleaning routine to a recurring event like every Sunday, and always check your user manual for specific maintenance schedules, as they can vary by model.