How to Clean a Humidifier With Vinegar
If you’re wondering how to keep your humidifier clean and smelling fresh, the process is simpler than you might think. Using just vinegar and water, you can remove mineral buildup and bacteria that can cause musty odors or affect air quality.
By the end of this guide, you’ll know the easy steps to disinfect your device and keep it running smoothly. Let’s walk through how to do it safely and effectively.
Why Vinegar Is the Best Humidifier Cleaner
Vinegar is the best humidifier cleaner because its mild acetic acid effectively dissolves mineral deposits and prevents white dust caused by hard water. It also kills bacteria and mold, reducing microbial growth by up to 99%. Unlike harsher chemicals, vinegar is environmentally friendly—it’s non-toxic and biodegradable, so it doesn’t pollute waterways. Additionally, it produces no fumes or residues like bleach or ammonia, making it safer to use around your home. When rinsed properly, vinegar is gentle on plastic parts of your humidifier, ensuring a thorough clean without risking damage. Overall, vinegar provides a powerful, safe, and eco-friendly cleaning option for maintaining a healthy humidifier. For those seeking to improve overall indoor air quality, a dehumidifier can also offer important health benefits by reducing excess moisture that promotes mold growth. To maximize effectiveness, avoid common mistakes such as over-filling the diffuser or using too many reeds, which can actually reduce scent throw. For cooling a room without a whole-house system, window air conditioners are a popular alternative to humidifiers for managing indoor climate.
What You’ll Need Before You Start Cleaning
To prepare for cleaning, gather all your supplies before you start to avoid interruptions. Essential items include white distilled vinegar, which is key for dissolving mineral buildup, along with warm water for mixing and rinsing. Use a soft-bristled brush or an old toothbrush to reach crevices, and have a microfiber cloth ready for wiping surfaces. A bucket or bowl will help soak parts if needed.
For safety, unplug the humidifier first, and check your manufacturer’s instructions for any material-specific precautions. If your skin is sensitive, wear protective gloves to prevent irritation. While distilled water is optional, using it for refills can reduce future mineral deposits. Keep a bottle of mild dish soap nearby for grime removal, but avoid using bleach unless disinfecting separately from vinegar. Reviewing top air cleaners with humidifiers can help you understand which models resist mineral buildup best. For a similar passive approach to freshening the air, reed diffuser oils use capillary action to continuously release fragrance without electricity. A bedroom dehumidifier can also help maintain optimal humidity levels by removing excess moisture from the air.
Set up your workspace near a sink with a drying rack or a clean towel for drying parts. Have a toothpick on hand for cleaning narrow ports, and prepare fresh refill water ahead of time. Empty the water tank after each use to prevent mold and mildew from developing. Having these items ready ensures a smooth cleaning process and helps you stay efficient and safe from start to finish.

5% ACIDITY: Clear distilled white vinegar with a clean, sharp taste

One 16-fluid-ounce bottle of Distilled White Vinegar

5% ACIDITY: Clear distilled white vinegar with a clean, sharp taste
Take It Apart and Let the Parts Soak
Start by unplugging the unit before disassembling it. Remove the tank, lid, cap, and any other detachable parts, ensuring all electronic components stay dry. Consult the manual for your model to check for any specific restrictions or warnings. Empty the tank of leftover water before filling it with a vinegar-water mixture—roughly 2 tablespoons per half gallon or a 1:1 ratio for heavy buildup. Let the mixture soak for at least 20 to 30 minutes. Occasionally swish the solution around to reach seams and corners. Place small detachable parts—such as filters or caps—in a separate bowl filled with the solution. During disassembly, check the air filter for maintenance needs, and ensure the humidifier is placed in a well-ventilated area for drying. Never allow electronic components to get wet. Soaking is a key step in preventing mold and buildup inside the unit. Using a dehumidifier to keep centipedes away can help reduce moisture that attracts these pests. Once the soaking time is complete, discard the vinegar solution. There’s no need to scrub immediately, as the soak alone helps loosen scale effectively. After discarding, repeat the process with fresh water for effective cleaning and to remove any remaining vinegar residue. For the best results, use the right tools such as a soft brush to gently clean hard-to-reach crevices after soaking.

【Deep Cleaning Power】 Effortlessly remove stubborn dirt from your humidifier with our advanced humidifier Cleaner Brush Set. Breathe fresher air while keeping your home healthy.

High Quality Material: Parts washer brush crafted from high-quality rubber hose, plastic handle and PP bristles, soft and not easy to fall off. The parts cleaning brush designed to clean deep crevices and loosen stubborn deposits.
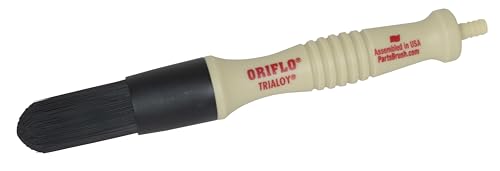
Designed for industrial parts washers with solvent circulating pumps.
Scrub Away Stubborn Mineral Buildup
After the soak loosens the mineral crust, you still need to remove stubborn spots clinging to the tank or base. Use a toothbrush, soft sponge, or cloth to target these chalky deposits directly. Gentle mechanical action is more effective and safer than hard scrapers, which can gouge plastic or damage the heating element. For tight corners, a small brush can reach where larger tools can’t, and you may need multiple passes if the crust is heavy. This method is similar to building a DIY air purifier at home, which requires careful material selection and assembly. Opt for alternative abrasives like a soft-bristle brush or a non-scratch pad instead of harsher scrubbers. Pour undiluted vinegar directly onto caked-on areas to reinforce the acid’s effectiveness. Always prioritize chemical safety by avoiding mixing vinegar with bleach or other commercial cleaners, and keep it away from electronic parts. When you see fizzing, it indicates the acid is working. Continue scrubbing until the surface feels smooth and free of deposits.

Value Set: Includes 6 pcs small cleaning brushes of different sizes, shapes, and hardnesses to meet various cleaning needs.

SCRATCH-FREE CLEANING BRUSH: Your collection of fine glass stemware or vintage model cars is impressive, but the dust that builds up on them isn’t. The HOME-X Soft-Tip Cleaning Brush is the right brush cleaner for those fragile or hard-to-reach items that require special cleaning care and a gentle touch.

CPAP Tube Cleaning kit: Keep your CPAP machine clean and in optimal working condition with our Brush Diameter 15mm 19mm designed specifically for CPAP tube cleaning. This brush is an essential tool for maintaining a healthy and CPAP therapy experience.
Rinse Thoroughly, Dry Completely, and Kill the Vinegar Smell
Rinsing thoroughly, drying completely, and eliminating the vinegar smell are essential steps to ensure your humidifier is fully clean. After scrubbing away the buildup, you should rinse the tank, base, and all parts at least three times with fresh water, paying special attention to crevices and valves where residue can hide. This multiple rinsing prevents leftover vinegar from tainting your next mist cycle. Unplug the unit and dry everything completely using a microfiber cloth on surfaces, then air-dry all parts separately on a towel or rack. For best results, approach this task with the same precise placement care used when positioning a thermostat to ensure proper airflow. Never reassemble while still damp, as moisture can promote mold or unpleasant odors. To remove the vinegar smell, run the humidifier with clean water for a few minutes, allowing it to circulate and dissipate any residual scent. Completing this thorough process ensures no odors or residues remain, keeping your humidifier safe for both your home and your pets. For ongoing maintenance, establish a regular cleaning schedule that prevents mineral buildup and extends the life of your device, just as smart thermostats optimize efficiency through consistent environmental monitoring. Choosing a space heater with similar durability ensures long-term performance and reliability in your home.
Clean Weekly: Use Distilled Water to Stop Scale Before It Starts
Using distilled water weekly is the most effective way to prevent scale buildup in your humidifier. Since it contains almost no minerals like calcium and magnesium, it stops deposits from forming inside the unit. This proactive approach keeps your humidifier running smoothly and reduces the need for cleaning. It also helps maintain better humidity control because internal parts stay clear of crusted deposits. Additionally, you will notice less white dust on your furniture and spend less time scrubbing. Using distilled water reduces nutrients that promote mold and bacterial growth, improving air quality and hygiene. For those suffering from congestion, a well-maintained humidifier can serve as one of the best cold remedies by adding soothing moisture to the air. Overall, making distilled water a weekly habit extends your humidifier’s lifespan and keeps maintenance easier.

One gallon of Distilled Water

smartwater is h2o crafted through a vapor distillation process inspired by the clouds, for a taste that is always crisp and pure
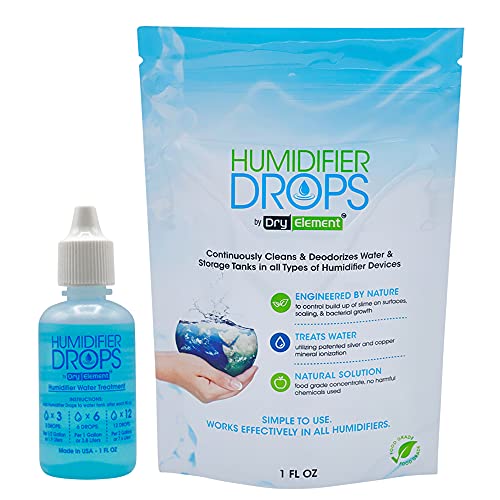
THE ORIGINAL FORMULA: We are the first and the only true authentic humidifier treatment solution on the market. We thank our customers for their trust and support