
How to Clean a Vornado Tower Fan
If your Vornado Tower Fan isn’t cooling as well or is making more noise than usual, it might just need a good cleaning. Regular maintenance can prevent motor strain and help it run smoothly for longer.
You can start by unplugging it and removing dust from the front and rear grilles with a soft brush attachment.
For stubborn dirt inside, carefully open the housing by unscrewing the recessed screws near the base. Wipe the blades with a dry microfiber cloth and let everything dry completely before reassembling.
Keep reading for detailed steps to keep your fan quiet and efficient.
Why Regular Cleaning Prevents Motor Damage
Regular cleaning prevents motor damage by stopping dust buildup that forces your motor to work harder. Dust clogs blades and vents, reducing airflow and making your motor strain to move the same amount of air. This extra effort increases heat and accelerates wear on internal components. You might notice louder operation or weaker airflow before the motor actually fails—those are signs your motor is already under stress. By cleaning dust before it accumulates, you keep airflow unobstructed and help your motor stay cool. This simple habit reduces internal friction, prevents overheating, and extends the motor’s lifespan by warding off long-term damage caused by neglect. For high-use fans, annual cleaning is recommended to maintain efficiency. Just as a humidifier relies on unobstructed airflow to maintain consistent moisture output, a fan’s motor needs clear passage to operate efficiently. Selecting a top-rated window unit can also reduce motor strain by ensuring efficient airflow from the start. When choosing a cooling device, reviewing portable air conditioners for their performance and airflow design can help you avoid future motor strain.
Gather Tools Before You Start
To prepare for cleaning, gather the essential tools to do the job efficiently and safely. Start with a flathead screwdriver, wrapping its tip in a soft cloth to prevent scratching the front grill when prying. Check whether your fan uses a star or Torx screw instead of a Phillips head, as hardware varies by model. Use a vacuum with a brush attachment to remove dust from vents and interior slots, and have a microfiber cloth ready for wiping down grills and housing. A small brush or old toothbrush helps loosen dust from narrow grooves before vacuuming. For wet cleaning, prepare a mixture of mild dish soap and warm water—harsh chemicals can damage plastics. Keep safety gear like a mask and safety glasses nearby to protect against dust. Also, ensure drying space is available for parts, though replacement grills are only necessary if you notice damage. For stubborn debris inside, compressed air can help blow out the dust that’s hard to reach. A low-humidity environment helps deter pests like centipedes, so consider using a dehumidifier after cleaning to maintain optimal moisture levels in your room. Cleaning the fan outdoors provides better ventilation and safety. Before starting, review top ceiling fan with light flush mount reviews to ensure your cleaning approach avoids damaging delicate light fixtures.

Efficient cleaning: This set includes 3 bendable fan dusters with microfiber heads, fan cleaner allowing you to easily remove dust and dirt from ceiling fans, floor vent fan,air conditioning vents, curtains, and more.

【Size and Quantity】You will receive 12 feather dusters, with 6 colors: red, orange, green, light blue, blue, and rose red. There are two of each color. The sufficient quantity and rich colors can easily meet your various gap cleaning needs.

Fan Cleaning Solution:Still worried about fan cleaning?Try our fan cleaning brush set! Flat brushes and sponges allow deep cleaning of removed fan blades to remove stubborn stains;The duster brush can quickly remove the dust on the surface of the fan blade, without disassembly, convenient and fast. 3 small brushes are specially designed for cracks and motor parts of the stain, easy to clean hard-to-reach corners, to achieve a comprehensive, no dead Angle cleaning effect, make the fan look new.
How to Open a Vornado Tower Fan Housing
To open the Vornado tower fan housing, follow these steps. First, unplug the fan and allow it to cool completely to avoid shock or injury. Locate the housing screws; most models use three recessed Phillips-head screws, which are often hidden near the control panel or at the base. Some screws may sit deep, so use a long, slender screwdriver for better reach and leverage. Do not force any screws that appear to be tight or stuck, as they may not release the cover easily. However, unlike Barnetto’s tower fans, which use four screws for base assembly, Vornado’s housing screws are typically recessed and require a longer screwdriver. For best results, place the unit near a window to ensure proper exhaust venting if you later connect it to a hose kit. A dehumidifier can also improve comfort by reducing excess moisture in the air. For optimal cooling performance, consider the best BTU rating when selecting a portable air conditioner.
Once the screws are removed, carefully lay the fan face down on a soft, stable surface. Gently wiggle or lift the front cowling straight off. If you encounter resistance, use a flathead screwdriver to carefully pry at the seam—avoid forcing it, as this can crack the plastic. During the process, keep moisture away from the motor to prevent damage, and place all screws in a labeled container to avoid losing them. If the housing stays stuck, double-check for any hidden fasteners rather than applying excessive force.
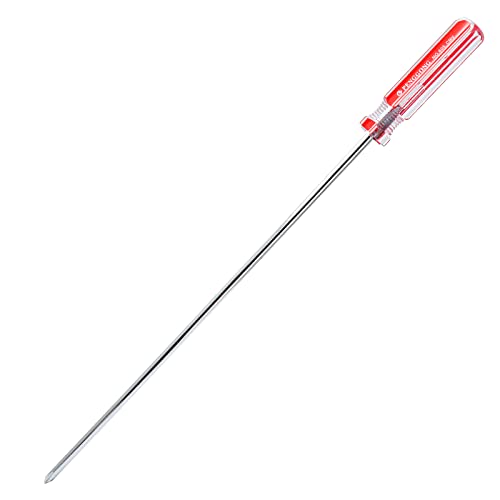
Package Content: 1 x Extra Long Phillips Screwdriver 10 Inch, which is the ideal size and length for the job. The longer length allows you to easily enter the place.
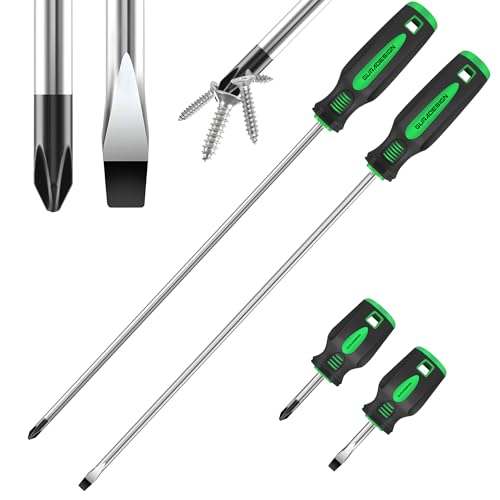
【HIGH QUALITY】: Made of chrome vanadium steel with heat treatment,high hardness, large torque, long service life. 12" Extra long size slotted & phillips screwdriver,ideal for hard to reach awkward areas.

【Size Information】: Shaft Size: 250 x 5mm / 10 Inch x 0.2 Inch (PH1), Total Length: 330mm /13 inch. These materials ensure the durability and reliability of the product while providing a comfortable grip.
Remove Dust From Blades and Vents Carefully
Once you’ve opened the housing, removing dust from the blades and vents requires care and the right tools. Start by vacuuming vent debris from the front and rear grilles to capture loose particles. Next, use a soft brush along the vent slats to dislodge trapped dirt. For stubborn dust on the blades, apply short bursts of compressed air across the blade area, being cautious to avoid damage. Gently wipe each blade with a soft cloth, using light pressure. To clean vent debris from tight corners, wrap a cloth around a slim tool for precision. Always keep the motor dry during this process. When cleaning, make sure to access both sides of the blades if possible, and dry all surfaces thoroughly before reassembling. Use a household vacuum to remove dust from the inside of the unit and grille, as this captures loose particles before you begin detailed wiping. To prevent future buildup, consider applying an anti-static spray to the blades after they are completely dry. For a more thorough approach, consider how a DIY sensor setup could help you monitor airflow efficiency and detect when dust buildup is affecting performance. Additionally, a smart thermostat can automatically adjust your home’s temperature based on real-time data from sensors, ensuring optimal comfort and energy savings.

【Powerful Airflow for Deep Cleaning】 Deliver ultra-strong airflow up to 110,000RPM—this electric air duster easily removes dust from keyboards, laptops, cameras, and car vents. A perfect compressed air alternative, ideal for cleaning sofas, window tracks, and hard-to-reach corners without pressure loss.


Powerful Turbo Fan:CAGIWIRU Electric Air Duster have reached speed up to 130000RPM,Can efficient remove dust and debris.With LED light and Three Adjustable Speed to meet with different cleaning tasks.
How to Reassemble and Test Your Fan Safely
Plug in the fan and turn it on at the lowest speed setting. Listen closely for any scraping or rattling sounds, which could indicate misaligned blades or debris caught inside. Also, observe the airflow to ensure it’s smooth and steady without interruptions. If you hear abnormal noises or notice wobbling, turn off the fan immediately to prevent damage or injury. These signs suggest that further adjustment or cleaning may be necessary before using the fan at higher speeds. For long-term reliability, choosing a model with superior build quality can help reduce the need for frequent maintenance. After cleaning, the motor should operate quietly and efficiently, confirming that bearings spin freely following lubrication and removal of varnish buildup. To avoid repeating this deep-cleaning process too often, consider adjusting diffuser output by using fewer drops of oil and shorter run cycles, which keeps the surrounding air fresher and reduces airborne residue that can settle on fan components. Applying a soft brush attachment to a vacuum cleaner during routine dusting helps prevent mold and buildup on the grille and blades.