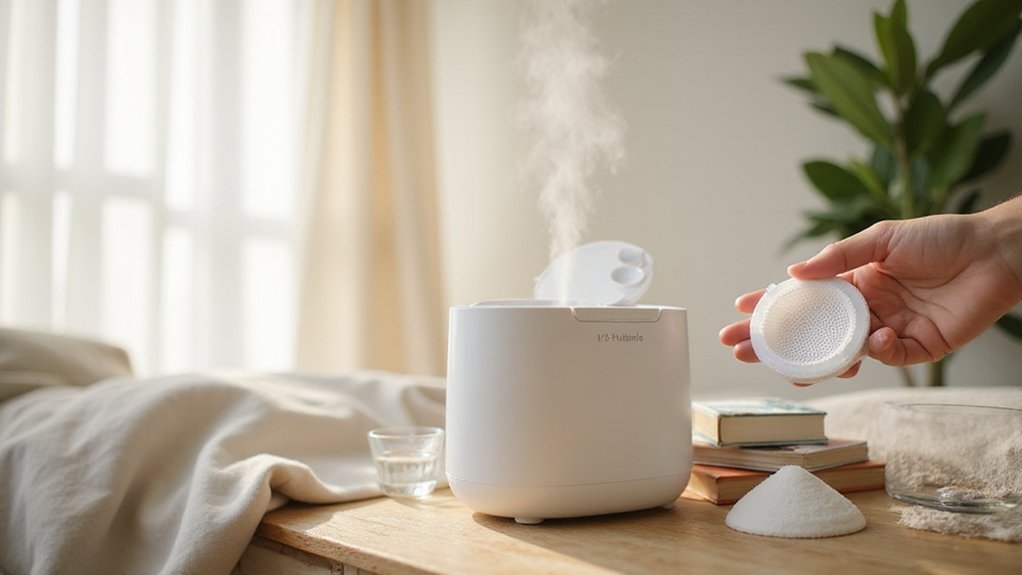
How to Replace a Vicks Humidifier Filter
If your Vicks humidifier isn’t producing enough mist or the filter looks dirty, it might be time for a replacement. Changing the filter regularly helps maintain optimal humidity and keeps the air quality better.
In this guide, you’ll learn how to safely replace your humidifier filter to keep it running smoothly.
Unplug, Empty, and Prep Your Humidifier Safely
Unplug your humidifier before touching it to avoid electrical hazards. Even if the power switch is off, a live unit can shock you if water contacts internal components. Always turn off the switch first, then grasp the plug directly—never pull on the cord—and disconnect from a 120V outlet. Using extension cords or power strips increases the risk of electric shock and should be avoided.
Before servicing, thoroughly empty the water tank, base, and reservoir. Spilled water near a plugged-in unit creates a serious shock hazard. Allow the humidifier to cool for at least 15 to 20 minutes after use because hot water and heated parts can burn your skin. Keep your hands dry when plugging or unplugging to prevent accidental shocks. For year-round comfort, consider reviewing top window air conditioners if you also need reliable cooling in warmer months. To further protect your home from moisture issues, a dehumidifier for mold can help maintain optimal humidity levels.
Place the humidifier on a water-resistant surface, such as in the kitchen or bathroom. Remove accessories like the medicine cup to prevent spills and messes. Finally, always ensure the unit is unplugged and dry before performing any filter cleaning or maintenance. Following these safety steps helps you avoid electrical hazards and makes servicing your humidifier safer and easier. Choosing the best bedroom dehumidifier also depends on the room’s square footage and typical humidity levels, as covered in expert guidance.
Remove Your Old Vicks Humidifier Filter
To remove your old Vicks humidifier filter, start by unplugging the unit and emptying the water tank. Once the humidifier has cooled down and is on a stable surface, locate the filter. Vicks wicking filters are typically positioned in the base or within a filter tray. Identify the access points, which may vary by model—some models require you to lift the filter compartment straight up, while others need the tray removed first. This process is designed to be easy to access for user convenience. Unlike reusable filter types, you may choose to switch to a fragrance oil diffuser for scenting your home instead. Using a dehumidifier instead can help keep centipedes out by reducing moisture in your home. For best results, consider using distilled water to minimize mineral buildup in your humidifier.
Carefully lift the old filter without bending or tearing it to prevent debris from falling inside. Since the filter is wet, avoid wringing or squeezing it; lift it out intact instead. If the filter housing or tray must be removed, do so gently and set it aside. Immediately discard the used filter, as it cannot be cleaned or reused. Proper removal ensures your humidifier’s compartment is clean and ready for the new filter.
Inspect the Compartment for Buildup or Damage
Unplug the unit and remove its housing to inspect the filter compartment thoroughly for buildup or damage. Look for signs such as white mineral scale, chalky residue, or dust, which indicate compartment buildup. Odor-related buildup, often caused by standing moisture, can also suggest mold growth. For damage, check for cracks, warped plastic, or broken housing tabs that might prevent the filter from fitting properly. Examine areas near water-exposed parts for corrosion and ensure all loose components are secure. A dirty or damaged compartment restricts airflow and reduces humidifier output. After inspecting, wipe the compartment with a clean, dry cloth and confirm it is completely dry and intact before installing a new filter. Use only undiluted vinegar to wipe the base thoroughly if any buildup is discovered during the inspection. For comparison, air purifiers with washable filters offer a similar maintenance advantage by allowing reusable cleaning instead of frequent replacements. A DIY approach to reed diffuser maintenance can help reduce mineral buildup in the compartment by acting as a natural alternative to chemical cleaners. Building a smart thermostat at home requires similar attention to sensor placement and compartment cleanliness for accurate performance.
Prepare the New Vicks Filter Correctly
Before opening the packaging, verify that the replacement filter matches your specific Vicks model by checking the part number on the box. Keep the filter sealed until you’re ready to avoid dust exposure during preparation.
To prepare the filter, fill a basin with cool tap water and completely submerge the new filter. Let it soak until it absorbs water evenly, ensuring it can wick properly later. Avoid wringing or squeezing the filter, as twisting damages the absorbent fibers. If it feels stiff after soaking, you can gently fold it flat to help with the process. Soaking the filter in cool water pre-moistens it for optimal moisture delivery. This initial soak mimics the filter priming process used for wick-based humidifiers to ensure consistent performance. Using a regular cleaning schedule for your humidifier prevents mold and buildup that can clog the filter. Placing the humidifier on a level surface also helps the wick absorb water evenly for best results.
Handle the filter gently throughout the process to protect its delicate structure. Do not squeeze or twist it, as this can cause damage. The goal is to pre-moisten the filter for optimal moisture delivery, not to force water out. Use only cool water; keep chemicals away from the filter during this step. Discoloration over time due to mineral absorption is normal. Once soaked, the filter is ready for installation.

【𝗖𝗼𝗺𝗽𝗮𝘁𝗶𝗯𝗶𝗹𝗶𝘁𝘆】The WF2 Humidifier Filter compatible for Vicks Starry Night and Vaporizer V3100, V3500, V3600, V3700, V3800, V3850, V3850JUV, V3900, V3900JUV, VEV400 Series; Fits for Kaz 3020.Replacement part # WF2, PWF2.

WF2 HUMIDIFIER FILTER - The vicks humidifier filter using environmental protection professional filter paper, scientific honeycomb mat design, can maximize the absorption and output of water, for the dry room continuous supply of moist air, create a comfortable home environment. Enhanced structure, quality catch up with the original, extend the service life of the filter element, to provide you with cost-effective products

Humidifier replacement filter for cool mist humidifiers for bedrooms: Designed for use with some Vicks cool mist room humidifiers & other models, this wicking filter removes minerals and pollutants from water
Install the Vicks Filter Step by Step
Unplug the humidifier and turn the power switch off before starting. Remove the water tank and drain any remaining water from the base. Place the unit on a firm, level surface to prevent tipping during maintenance. Locate the filter compartment and lift the white housing straight up to access the filter slot. Carefully pull out the old filter, avoiding any damage to the surrounding parts. Check the compartment for debris and clean it if necessary, as good filter maintenance includes keeping this area free of dust and buildup. A dirty filter often shows visible discoloration from trapped minerals and mold, which signals it is time for a replacement. For proper setup, always place the humidifier on a firm, level, water-resistant surface to protect against moisture damage. Using a space heater nearby instead of raising the whole home’s thermostat can cut your electricity bill significantly by heating only the occupied zone. An air quality monitor can detect mold spores in the home, helping you confirm when filter replacement is needed.
Insert the new filter designed for your model. If needed, fold it flat before inserting. Push the filter snugly into the slot until it is correctly seated, ensuring proper alignment to prevent pinching. Replace the housing or filter tray, making sure it fully covers the new filter with no material exposed. Double-check that the compartment is properly closed before refilling the water tank. If you notice the filter isn’t fitting correctly or the housing isn’t secure, recheck the alignment and secure all parts firmly before proceeding.

COMPATIBLE BRANDS: TOMOON WF2 humidifier filter is compatible with a wide range of Vicks, Ka.z, Sunbeam, Honey.well, Enviracaire, and Re-liOne humidifiers
Protec genuine filters are designed to work with Vicks Cool Mist Humidifiers; Improve your home comfort with a Protec Vicks humidifier replacement

【WF2 COMPATIBILITY】Compatible with Vicks V3100, V3500, V3500N, V3700, V3800 and V3900 humidifiers using WF2-style wick filters.
Reassemble and Restart the Humidifier
To reassemble and restart your humidifier correctly, follow these steps in order:
First, place the water tray back into the base. Next, snap the heating element cover into place securely. Slide the blue locking latch to the closed position to ensure the compartment is sealed. Then, reinstall the mist chimney onto the unit. If your model includes a medicine cup, press it back into position.
Before proceeding, turn the power switch off and unplug the humidifier. Allow the unit to cool for about 15 minutes if it was recently running. This ensures the heating element is safe to handle. As part of regular maintenance, you should also clean the unit with white vinegar to prevent mold and mineral buildup. Soaking the removable parts in undiluted white vinegar for 20 minutes effectively dissolves scale and disinfects the surfaces. Refill the water tank, replace its cap tightly, and place the tank onto the base so it drains properly. A well-maintained humidifier can improve bedroom air quality by adding necessary moisture to the air.
Plug the humidifier into a standard 120-volt outlet, then switch it to either Hi or Low setting. If necessary, press the reset button. Keep in mind that mist may take several minutes to start appearing. Use these steps regularly as part of your maintenance to keep your humidifier functioning properly. If no mist appears, check the water tank, outlet, and circuit for any issues.
Replace the Filter When Mist Output Drops
If your humidifier’s mist output drops despite reassembling and restarting it, the filter probably needs replacing. A decline in mist signifies the filter is clogged or dirty, preventing proper water transfer. Start by inspecting the wick for discoloration—yellow or brown stains indicate mineral buildup blocking airflow. This buildup hampers water absorption, leaving the top surface dry and reducing mist. Even if the fan is running, a clogged filter cannot deliver moisture effectively. Do not confuse normal evaporation with a filter issue; check if the water tank level drops over a 24-hour period. If the output remains low and the filter looks stained or feels stiff, replacing it is the best step. Installing a new filter restores airflow and humidity, fixing the mist output problem. Selecting a replacement wick designed for your model ensures proper fit and performance. Using distilled or filtered water minimizes mineral deposits that accelerate filter clogging. To keep the unit working efficiently between replacements, regularly wipe down the exterior and air vents with a soft cloth to prevent dust from restricting airflow and buildup around the machine.

Wf2 humidifier filters Compatible with Honeywell HCM-300T, HCM-315T, HCM-350, HCM-350B, HCM-630, HCM-631, HCM-645, HCM-650, HCM-710, HCM1000, HCM2000, HCM540 Series. Humidifier filter for Honeywell HAC504 Filter A HAC 504 HAC-504 HAC-504AW HAC504V1 wicking filter.

𝐂𝐎𝐌𝐏𝐀𝐓𝐈𝐁𝐋𝐄 𝐌𝐎𝐃𝐄𝐋𝐒 - Funmit WF2 humidifier filter perfect fits for Vicks Starry Night and Vaporizer V3100, V3500, V3600, V3700, V3800, V3850, V3850JUV, V3900, V3900JUV, VEV400 series; Fits for Kaz 3020; Fits for Sunbeam SCM1118, SCM1119, SCM1120; Fits for Honeywell HCM300T, HCM315T, HCM350, HCM350B, HCM630, HCM631, HCM645, HCM650, HCM1000, HCM2000, HCM540 Series, HCM710; Fits for Enviracaire ECM-250i, ECM-500; Fits for Re-liOne WA-8D. Compared to Part # WF2 and PWF2 filter

Compatible with the humidifiers: Vicks: V3100, V3500, V3500N, V3600, V3700, V3800, V3850, V3850JUV, V3900 & V3900JUV. Kaz: 3020. Sunbeam: 1118, 1119 & 1120 Honeywell: HCM-630, HCM-631, HCM-645, HCM-650, HCM-300T, HCM-315T, HCM-350, HCM-350B, HCM-1000, HCM-2000, HCM-540 & HCM-710. Enviracaire: ECM-250i & ECM-500. ReliOn: WZ-8D.
How Often to Change Your Vicks Filter (And Make It Last)
To extend the life of your Vicks filter, always air-dry it thoroughly when the unit is off. After each use, flip the filter top-to-bottom to promote even saturation and prevent uneven wear. Use only cool water—avoid chemicals, vinegar, or other cleaning agents—as they can damage the filter material. Never let the filter sit in standing water when the humidifier isn’t running, as this can cause mold and deterioration. Keeping your humidifier clean and free of mineral buildup also helps prevent accelerated wear on the filter. Regularly inspect the filter for signs such as color fading, odors, or diminished mist output, which indicate it’s time for a replacement.

𝐂𝐎𝐌𝐏𝐀𝐓𝐈𝐁𝐋𝐄 𝐌𝐎𝐃𝐄𝐋𝐒 - Funmit WF2 humidifier filter perfect fits for Vicks Starry Night and Vaporizer V3100, V3500, V3600, V3700,...