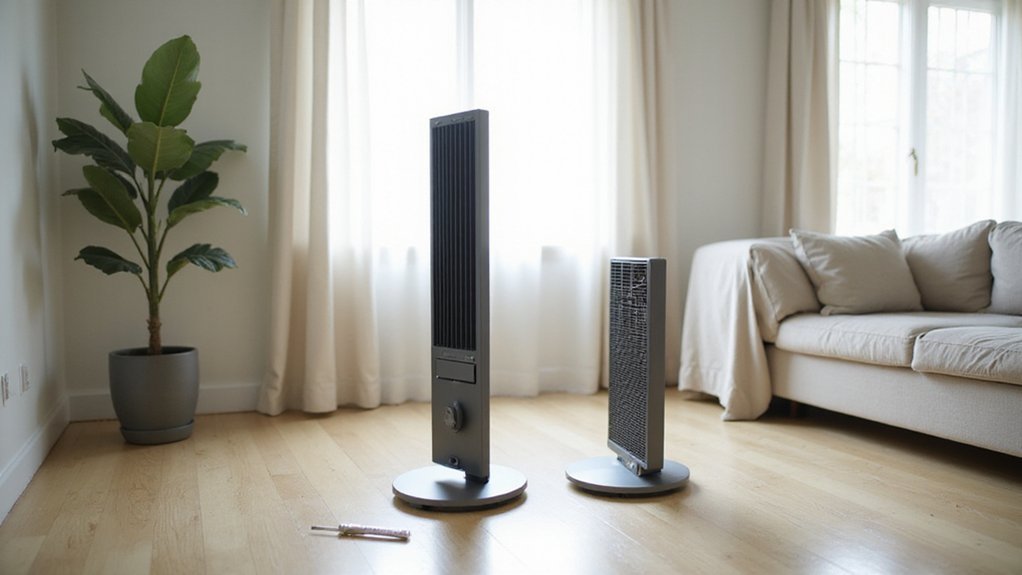
How to Disassemble a Honeywell Tower Fan
If you’re trying to disassemble your Honeywell tower fan, you might wonder where to start and how to do it without causing damage.
Knowing the correct steps can save you time and prevent broken clips or cracked plastic.
By the end of this, you’ll have a clear idea of how to safely take apart your fan for cleaning or repairs, all step by step.
Honeywell Tower Fan Disassembly: Unplug and Gather Phillips or Torx Tools
Unplug the fan and gather the appropriate tools before disassembly. For most Honeywell tower fans, a Phillips screwdriver will suffice, but some models may use Torx fasteners. Always check the back and top of the housing for screws, as they can be hidden or recessed. Use the correctly sized bit to prevent stripping screws. To stay organized, prepare a small container for the screws and place the fan on a soft surface to protect its finish. This safety-first approach ensures you can disassemble the fan efficiently without damaging components or risking electrical shock. Newer fans with PSC motors made post-2019 also contain a capacitor that improves efficiency, so handle the rear housing and wires carefully during disassembly.

PREMIUM MATERIAL - Forged from chromium molybdenum vanadium steel with chrome plating, these screwdrivers provide superior corrosion resistance and long-lasting durability suitable for automotive and household repair tasks

Top quality magnetic screwdriver set, 10 professional grade screwdrivers that are designed to serve a multitude of uses.

Dual material handle provides a more comfortable grip and higher performance
Remove the Base Without Breaking Clips or Stripping Thumbscrews
To remove the base without breaking clips or stripping thumbscrews, start with the fan unplugged and your tools ready. First, check if your model has a threaded collar or a red plastic piece underneath that needs to be untwisted. Most Honeywell fans have three thumbscrews on the bottom. Loosen these screws by hand with gentle, steady pressure to prevent stripping. Do not force the base attachment; once the screws are free, the base should come away easily without the need for prying. To safely remove the collar, unscrew it by turning counterclockwise until a click is heard, indicating it is fully free. For ongoing maintenance, applying a prevent mold routine will help minimize future buildup on the fan blades. A dehumidifier is a more effective solution for tackling musty smells in the surrounding air. For campers seeking an alternative cooling method, consider portable air conditioners for reliable temperature control.
To avoid breaking clips, approach the removal from the top and sides. Look for gaps or side notches as entry points. Insert a sharp flathead screwdriver only into these gaps and apply gentle pressure. Be careful to preserve the integrity of the clips, especially on the front and thin plastic seams, which are more prone to cracking. The base may split into two halves; handle it carefully to prevent damage.
Pop Off the Front and Back Grilles Without Stripping Screws
To pop off the front and back grilles without stripping screws, start by locating the rear-edge fasteners. Most Honeywell tower fans hide the release points on the back side rather than the front. You’ll find six Phillips or Torx screws securing the grille; some models hide these screws under a screw cover. Use a long, thin screwdriver for recessed screws, aligning it straight into the head to prevent cam-out. Turn the screwdriver to the left to loosen each screw, then set them aside. This process is similar to how a humidifier’s performance depends on proper airflow and vapor dispersal. Once the screws are removed, the grille should lift or pop off along the seam. Many modern designs also incorporate a flush mount for a sleek, integrated look. If instead you find a grille latch, gently pry it free—avoid yanking. Keep the fan unplugged and placed on a stable surface to prevent cracking the plastic. This method helps prevent stripped screw heads and makes reassembly easier. Choosing a humidifier with a large tank capacity reduces the need for frequent refills during use.

【Precision screwdriver set】-- 40Pcs screwdriver set has 30 CRV screwdriver bits which are phillips PH000(+1.2) PH000(+1.5) PH00(+2.0) PH0(+3.0) PH1(+4.0), flathead -0.8 -1.2 -1.5 -2.5 -3.0, torx T1 T2 T3 T4 T5, torx security TR6 TR7 TR8 TR9 TR10 TR15 TR20, triwing Y000(Y0.6) Y00(Y1.5) Y0(Y2.5) Y1(Y3.0), pentalobe P2(0.8) P5(1.2) P6(1.5), MID 2.5, with a screwdriver handle, a double-ended spudger, a long spudger, 3 triangle spudgers, Tweezers, a cleaning brush and a suction cup with SIM card thimble.

1.MULTIPLE SIZES The GRENPRO Precision Screwdriver Set solves the "too many tools, never the right size" dilemma with 10 essential tips covering 95% of micro-repair needs. Forget mismatched drivers, this watch screwdriver set handles everything between watch gears and smartphone motherboards. Including 4 flat(1/8, 1/16, 3/32, 5/64); 3 Phillips(PH0, PH00, PH000) and 3 Star(T9, T8, T7)
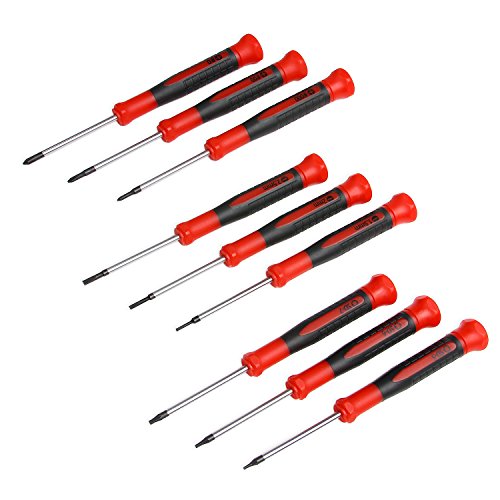
High strength chrome vanadium steel shafts reduce wear-outs and stripping for longer tool life
Access the Wind Tunnel Starting From the Bottom Screws
Start by unplugging the fan and placing it on its side on a soft pad. Remove any thumbscrews securing the base, but keep these separate from the wind tunnel screws since they are different. Next, inspect the underside for all visible fasteners; you’ll likely find six Phillips-head screws holding the internal air channel. Use a screwdriver to remove these screws carefully.
After removing the screws, do not pull on the housing yet. The control-panel wiring can stretch or be damaged if you force it. Gently disengage any snap tabs or a plastic collar to free the lower housing. With the housing separated, you’ll have direct access to the wind tunnel screws and the internal air channel. The fan housing should have been seated into the base until it seats itself, ensuring it is secure before proceeding. Unlike fan disassembly, humidifier maintenance often focuses on cleaning the internal air channel to prevent mineral buildup. For tower fans, you should also wipe down the blades with a damp cloth to remove accumulated dust. To prevent mold and buildup, regularly clean the fan’s air intake vents with a soft brush.
Remember the screw locations for easier reassembly. Before tightening, route the power cord through the keeper in the base to prevent stress on the wiring. This organized approach helps avoid damage and simplifies the reassembly process later.

【Versatile Phillips Screwdriver Set】This precision set contains the most commonly used 6 Phillips Screwdrivers: PH2*1.5", PH0*3", PH1*3", PH2*4", PH2*6", PH2*8". It's designed to effortlessly handle a variety of tasks, from assembling furniture to repairing electronics.

Alloy-steel blades are heat-treated for strength and durability

Screwdriver shafts are made of heat-treated S2 steel, which provides more impact strength than most CR-V steels, and the chrome plating provides higher hardness. More suitable for professional work
Remove the Fan Blade From the Motor Shaft
To remove the fan blade from the motor shaft, start by unplugging the fan and inspecting the hub for a set screw or retaining ring. Note how the blade aligns with the shaft to ensure proper reassembly later. Loosen the set screw several turns; remove it completely if you intend to pull the blade off the shaft. Carefully lift the blade directly away from the motor shaft—avoid prying against the housing, which could cause damage. If the blade resists movement, apply penetrating oil around the shaft area to loosen any rust or corrosion, and let it sit for a few minutes. Unlike a space heater, this fan does not produce carbon monoxide, so ventilation concerns are different. Gently work the hub back and forth while applying steady pulling pressure. Avoid applying sideways force, as this can bend or damage the shaft or hub. If resistance remains high, using a blade puller can apply even lifting force without damaging components, as demonstrated in HVAC condenser fan motor removal. To prevent imbalance and noise during reinstallation, keep the blade oriented in its original position throughout the process. A dehumidifier, in contrast, uses a refrigeration cycle to remove moisture from the air rather than simply moving it. For selecting the right appliance, consider that air circulators typically move air more efficiently over longer distances than standard fans.
Clean the Blade Assembly Without Damaging Bearings
To clean the blade assembly without damaging the bearings, start by unplugging the fan and placing it on a stable flat surface or on its side for easier access to the grille and interior. Use compressed air or a soft brush to gently remove loose dust, hair, and lint from the blades and surrounding wind tunnel. This step is crucial to prevent debris from being pushed deeper into the assembly during wet cleaning. Following disassembly, note that three bearings were observed, with the external bearing lacking oil retention and likely drying out before the others. For those who need a replacement, comparing best window air conditioners can help identify units with more durable bearing designs. A cool mist humidifier can provide similar comfort benefits by maintaining balanced humidity levels in the room. Using mold prevention tips regularly can also help keep the fan interior dry and debris-free.
For bearing protection, avoid spraying water or cleaner directly onto the motor or bearing seats. Instead, dampen a cloth with a mixture of water and vinegar, then gently wipe each blade. For narrow gaps, use cotton swabs to reach into tight spots. Do not scrub aggressively near the motor disc or bearing-related parts, as thin washers and surfaces are easily damaged.
Ensure all cleaned parts are completely dry before reassembling. Moisture can cause rust or electrical issues if it reaches the bearings or motor components. Taking these precautions helps maintain the longevity and proper function of your fan blades while safeguarding sensitive parts from damage.
Lubricate Motor Bearings to Stop Rattling Noises
To stop rattling noises caused by dry motor bearings, start with a thorough bearing inspection. Rotate the shaft by hand; if it feels rough or gritty, the bearings need cleaning and lubrication. Use a paper towel rolled into a rod to wipe out black residue from the bearing housing until it’s clean—this old gunk prevents fresh oil from doing its job. Once cleaned, apply proper lubrication. Use a light machine oil like 3-in-1 or Tri-Flow. Avoid using WD-40, as it acts as a solvent rather than a lasting lubricant. Place a single drop of oil into each bearing port and work it around by manually spinning the shaft. If there are felt wicks, saturate them with oil as well. Afterward, wipe away any excess oil to prevent leaks, ensuring smooth operation and eliminating rattling or squealing noises. Recognizing that shaft wear limits repair options, only lubrication was used to improve function despite the wobble from microscopic damage. Choosing a high-quality lubricant is similar to selecting a reed diffuser oil for its lasting performance rather than a quick-evaporating solvent. For a similar approach to quiet cooling, consider portable air conditioners without hoses that require no bearing maintenance for noise-free operation. To further reduce pests that thrive in humidity, a dehumidifier for centipedes can help eliminate the damp conditions attracting them to your home.
Reattach the Wiring and Align the Remote Sensor Before Closing
To reattach the wiring and align the remote sensor correctly, start by reconnecting the internal wiring leads. Match the leads by color and function—connect the black lead to black for hot, white to white for neutral, and green to green for ground. Secure each connection with wire connectors, ensuring they are tight and free of exposed copper. Additionally, ensure the thermal fuse inside the motor windings has continuity, as a blown fuse will prevent the fan from operating. Tuck the wiring bundle into the base cavity carefully, avoiding pinching or stressing the wires. To minimize static buildup near the fan, consider maintaining a comfortable humidity level in the room using a humidifier. Using a dehumidifier instead can also help prevent moisture-related damage to the fan’s internal electronics.
Next, adjust the remote sensor to ensure proper operation. Position the infrared receiver squarely behind its lens opening; misalignment can block the signal and prevent the remote from working. Make sure the bundled wires don’t shift it sideways. Confirm that the power cord sits properly in its molded channel. When closing the cover, it should sit flush without forcing—if it resists, readjust the wiring for a better fit. Finally, double-check that all connectors are fully seated, with no exposed copper strands. Proper alignment and secure wiring ensure your fan operates safely and reliably.
Compare Screw Types and Panel Orders for QuietSet and HT-900
The screw types and panel orders for a QuietSet tower fan differ significantly from those of an HT-900 personal fan, but a direct comparison is limited because a teardown for the HT-900 isn’t available. For the QuietSet, the disassembly starts with two thumb screws at the base, which are easy to remove by hand. Once these are out, you can separate the snap-fit halves of the base without special tools. Moving upward, the control panel’s top section may be secured with Phillips or Allen screws, depending on the model. Inside, the internal wind tunnel is held together with six Phillips screws, which need a Phillips screwdriver to remove.
The panel order for the HT-900 is not documented, so it’s safe to assume it uses a different layout with fewer panels and different fastener types. Often, smaller personal fans like the HT-900 use a combination of Phillips and Torx screws, but the exact pattern isn’t confirmed. When disassembling, always sort fasteners by their location and type. The QuietSet model tends to mix thumb screws, Phillips, and Torx screws depending on which panel you are removing. This variety underscores the importance of having the right tools on hand to avoid stripping screws or damaging clips.

Wide Range of Applications: Precision screwdriver can easily tighten or loosen small screws in some household everyday products: glasses, watches, laptops, tablets, cameras, jewelry, Android / iPhone, toys and other electronic products
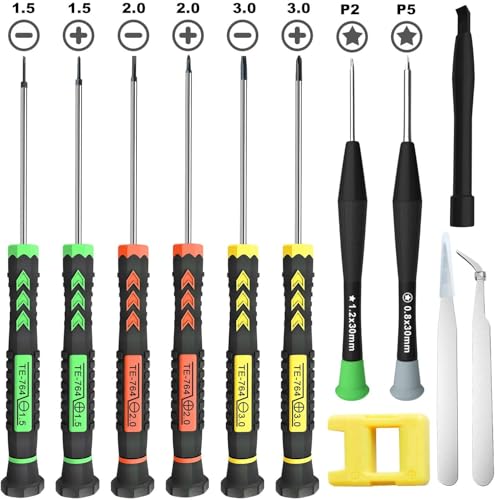
[Package Includes] – 1 x 3.0 Flathead Screwdriver, 1 x 2.0 Flathead Screwdriver, 1 x 1.5 Flathead Screwdriver, 1 x 3.0 Phillips Screwdriver, 1 x 2.0 Phillips Screwdriver, 1 x 1.5 Phillips Screwdriver, 1 x Pentalobe 2 Screwdriver, 1 x Pentalobe 5 Screwdriver, 1 x Helper Stick, 2 x Tweezers, 1 x Magnetizer & Demagnetizer Tool

【11 DIFFERENT SIZES / STYLES】 - Includes 00-Point 、0-Point 、 1-Point Phillips and Flat head 1.0mm,1.2mm,1.4mm, 1.8mm, 2.4mm, 3.0mm and 1 Awl、1 Magnetic