DIY Air Quality Monitor: A Beginner’s Guide
Wondering how to build an affordable air quality monitor yourself? For under $50, you can create one that tracks CO₂, PM2.5, and temperature— all with full control over what you measure.
With simple parts like an ESP32 and a small OLED display, you can set up something reliable and easy to use.
This guide walks you through every step to get your monitor up and running smoothly.
Why Build a DIY Air Quality Monitor Instead of Buying One?
Building a DIY air quality monitor is a cost-effective choice, typically costing under $50. This affordability allows you to customize sensor placement, ensuring units are positioned where pollutants are most likely to concentrate, such as in the kitchen or workshop. Unlike commercial models that are often fixed in one spot, your homemade monitor can be moved easily to track pollution levels in different areas. Customization means you can select specific sensors to measure pollutants most relevant to your environment, and you’ll learn calibration techniques to ensure your readings are accurate. Plus, with local control over the data, you can monitor real-time changes during activities like cooking or soldering, enabling immediate responses like opening windows. Building your own monitor also promotes data transparency, helping you recognize patterns of CO2 buildup and VOC spikes that might otherwise go unnoticed. This approach uses high accuracy sensor chips like the SCD41 for reliable CO₂ readings. For a complete understanding of indoor air quality, you can also consider window air conditioners that filter pollutants while cooling.
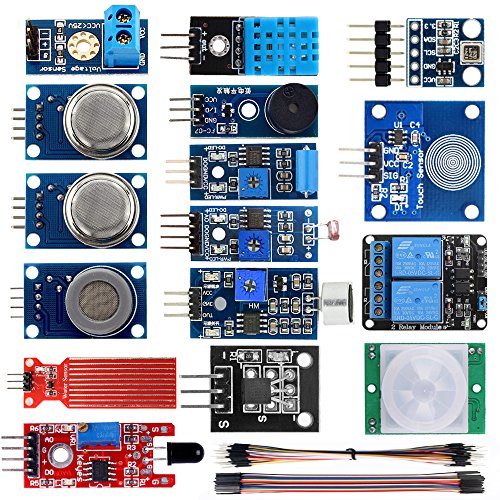
SMART HOME LEARNING KIT--This kit combines the most common electronic components of smart home projects,developed specially for those beginners who are interested in Arduino and raspberry pi DIY.
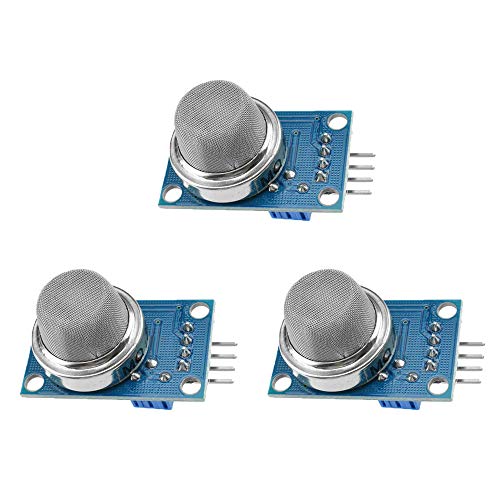
High quality dual panel design with power indicator and TTL signal output indication.

DETECTION CAPABILITY: Advanced sensor module detects harmful gases including ammonia, nitrogen oxides, alcohol, benzene, smoke, and CO2 for comprehensive air monitoring
What Sensors Does Your First Air Quality Monitor Need?
For your first air quality monitor, focus on three key sensor types: CO₂, particulate matter, and temperature/humidity. The Sensirion SCD41 provides accurate CO₂ readings, which are essential for detecting stale indoor air, with levels above 400–500 ppm indicating poor ventilation. Alternatively, the MH-Z19 offers a more budget-friendly option, though it may sacrifice some accuracy. If you ultimately prefer a scent-based approach to improving air freshness, consider how reed diffusers or candles compare in performance and cost.
For particulate matter, tracking PM2.5 is crucial because these fine particles can penetrate deep into the lungs. Sensors like the PMS5003 or SDS011 are popular choices for measuring PM2.5 levels, helping you identify situations that may pose health risks. Adding a humidifier can also enhance comfort by maintaining optimal humidity levels between 40 and 60 percent, which supports respiratory health and reduces allergy symptoms. When choosing a portable air conditioner, reviewers often compare quality, performance, and value to guide buyers toward the best model for their needs.
Adding a BME280 sensor allows you to monitor temperature and humidity, which influence both sensor calibration and particle behavior. Humidity levels above 60 percent can cause particles to clump together, skewing readings, while temperature fluctuations can affect sensor accuracy overall.
Skip VOC sensors initially—they tend to provide general trends rather than precise health data. Pairing the SCD41 with a sensor like the SEN54, which covers particles and VOCs, simplifies your build and provides a comprehensive view. This setup enables your data visualization to clearly display CO₂, PM2.5, temperature, and humidity, giving you actionable insights into your indoor air quality without overcomplicating your first project.

Highly accurate and efficient DC01 infrared PM2.5 air quality sensor module. Detects dust concentration and fine particles, perfect for monitoring haze. Small size, low power consumption, wide measurement range, and quick response time make it ideal for indoor air quality testing

MQ-7 module for carbon monoxide co: SnO2 sensing element heated inside a metal mesh cap
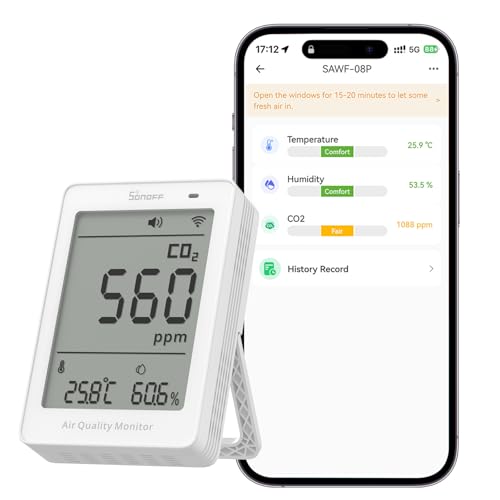
[Matter Compatibility] As an Air Quality Meter that supports the Matter ecosystem, it can seamlessly integrate with various smart home platforms (including Apple Home, Amazon Alexa, Google Home, SmartThings, and Home Assistant).
Choose a Microcontroller and Display for Your Air Quality Monitor
The best microcontroller for your first air quality monitor is the ESP32, combined with a compact I2C OLED display. The ESP32 offers built-in Wi‑Fi and Bluetooth, simplifying connectivity and sensor calibration by supporting multiple sensors on a single bus. Its support for I2C reduces wiring complexity and enables easy integration of sensors and the display.
For display choice, a small I2C OLED is ideal. It’s compact, energy-efficient, and connects easily via two data lines, keeping your build streamlined. Prioritize power management features on the ESP32 to extend battery life if portability matters, and verify that all your components support I2C to ensure seamless communication. This combination provides a versatile, beginner-friendly setup that’s capable of handling upgrades like filtering, trend analysis, or additional sensors later on. Understanding energy-saving tips for your monitor can help you reduce overall electricity costs, similar to how space heater efficiency lowers your bill. For consistent performance, schedule a regular filter replacement to prevent dust buildup from affecting sensor accuracy.

Three Displays For More Projects: Build a sensor dashboard, robot status panel and classroom demo at the same time, or keep spare modules ready for testing; each compact screen delivers 128x64 graphics with self-luminous pixels and no backlight

2.42" SSD1309 128x64 OLED Display Module

2.42-inch white monochrome OLED screen, 128x64 resolution, clear display effect, high contrast for crisp visuals.
Assemble Your Air Quality Monitor
Start your assembly by preparing the enclosure, since mechanical fit is crucial for everything that follows. Whether it’s 3D-printed or off-the-shelf, remove support tabs and test your tight tolerances. Install heat-set inserts if needed to ensure secure screw mounting later. Your choice of material—plastic, wood, or metal—affects both fit and airflow, so consider how each interacts with your components. Proper enclosure preparation ensures sensors will be exposed correctly and that assembly will be straightforward. Reducing indoor humidity with a best dehumidifier can help keep pests like centipedes out of your home. Understanding the basic fan-and-filter mechanism inside an air purifier can also guide your ventilation design. For a complete solution, you can also consult a Guide to Choosing the Best Bedroom Dehumidifier for additional moisture-control strategies.
Mount your dust, VOC, and CO2 sensors directly onto the case or front cover to ensure proper exposure. Use M2 or M3 screws for stable mounting, but don’t overlook double-sided tape for modules lacking mounting holes. Sensor orientation and position are critical for accurate readings; position sensors to avoid obstructions and dead zones. Confirm their placement before final assembly to prevent calibration issues down the line. For example, using an Arduino-based sensor module like the PMS5003 simplifies particulate measurement.
Wire all components temporarily with Dupont connectors first, verifying voltage compatibility between 3.3V and 5V peripherals. Once confirmed, secure connections with solder and heat-shrink tubing for durability. Place your fan at the edge of the enclosure to pull air across sensors, avoiding stagnation or dead-air zones. Before tightening screws for the final enclosure, do a dry-fit of the display and controller board. Carefully inspect all joints now, as rework becomes more difficult once everything is secured.
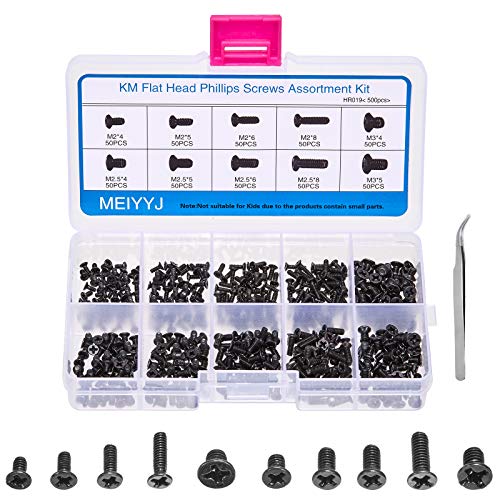
【Premium Material & Perfect Fit】- Made of high-quality carbon steel, these computer replacement screws are durable, non-toxic, and reusable. It will fit almost all kinds of computer types and help you repair or remodel them efficiently.

【Product name】:Hex Socket Head Cap Screws Bolts Nuts Kit,According with standardized metric system;

Contains: 13 Types Computer Screws for M.2 SSD, Power Supply, PC Case, Fan, Hard Drive, Applicable to: MSI GIGABYTE ASUS Motherboard Lenovo
Set Up Software for Your Air Quality Monitor
Choose your software stack first, because this decision determines how your hardware communicates with the environment. For simplicity, use the Arduino IDE to develop ESP32 firmware, managing library imports and pin mappings all in one place. Alternatively, choose ESPHome if you prefer direct integration with Home Assistant and YAML configuration files.
Set up your firmware files carefully, including your Wi-Fi credentials and a static IP address to keep your monitor consistently reachable. Store sensor calibration offsets either directly in your code or within a secrets file for added security. Adjust reading intervals on a schedule instead of continuous measurement to conserve power, especially if your device is battery-powered.
During startup, initialize your sensors properly before beginning measurements. Include display code to indicate connection status during boot-up, giving you visual feedback that the setup is progressing. Add cloud or MQTT credentials as needed to enable data transmission and remote monitoring.
Thorough testing is essential. Tune your update behavior to ensure stability before your air quality monitor logs its first sample, preventing false readings or communication issues. This approach helps ensure reliable operation and accurate air quality data.

【16-in-1 Multi-Index Air Quality Test Kit】This all-in-one indoor air quality meter tracks PM1.0 / PM2.5 / PM10 / Carbon Dioxide (CO₂), TVOC, HCHO, temperature and humidity. Tiered color lights show real-time air readings, guiding timely ventilation for families. It displays invisible pollutant levels for bedrooms, studies and nurseries.

Know your air – An Alexa air quality monitor that makes it easy to understand what’s in your indoor air.

【A 5-in-1 Multifunction Air Monitor】Qingping Air Monitor Lite tests 5 major factors of the indoor air quality: PM2.5 (the result of secondhand smoke), PM10, CO2, temperature and humidity. By knowing the real-time air quality, you can turn on the air purifier or open the window when needed.
Log Air Quality Data to Home Assistant, MQTT, or an SD Card
You should log your air quality data to Home Assistant, MQTT, or an SD card, depending on how you plan to visualize or access it. For real-time dashboards, sending data to Home Assistant via its native API or MQTT is ideal. MQTT is particularly suitable if you want to decouple sampling from publishing, which works well with ESP8266 or ESP32 microcontrollers, allowing flexible data flow and multiple room monitoring. If network connectivity is a concern or you prefer local storage, logging to an SD card stores timestamped CSV records directly on the device, making it accessible later without requiring network access. The sensor’s firmware handles data retrieval on a set schedule, MQTT publishing, and sensor warm-up, all managed by a single ESP32-based board serving as the central unit. If you are comparing air quality monitoring to improving indoor air, consider that HEPA filters offer a more direct removal method for particulate matter rather than just measurement. For a more thorough approach to improving air quality, you might also evaluate water air purifiers which use a different filtration mechanism compared to HEPA options. Similar to installing a smart thermostat, correct placement of your sensor away from drafts and direct sunlight ensures accurate readings.
Make sure to log key metrics such as PM1, PM2.5, PM10, CO2, VOC, temperature, and humidity. Regardless of your storage method, calibrating your sensors accurately is essential to ensure trustworthy data. Visualizing this data in Home Assistant or spreadsheets helps identify trends and can trigger alerts when thresholds are exceeded, improving your monitoring effectiveness. Your choice between these options should align with your workflow, available hardware, and whether you need real-time updates or long-term data storage.
How to Design Airflow and Enclosure for Better Sensor Accuracy
Ensuring accurate sensor readings depends on optimizing airflow and enclosure design. First, verify that vents are clear of obstructions so that room air can reach the sensing inlet directly. Avoid placing the monitor near HVAC vents, windows, or fans, as these sources create drafts and unstable environmental conditions that can skew readings. For consistent humidity sensing, the monitor should draw air from a well-mixed room rather than a single corner, similar to how big room humidifiers require even air distribution for reliable performance. Additionally, because air purifiers rely on consistent airflow to effectively capture pollutants, your monitor must also prioritize steady air movement to avoid misleading sensor data. It is also important to note that combustion-based space heaters can introduce carbon monoxide into the air, so the monitor should be positioned away from potential sources of this dangerous gas.
Your enclosure should also isolate heat sources. Keep the ESP32 and power components separate from the VOC sensor because internal heat affects temperature and VOC measurements. For the CO2 sensor, mount it with a gap underneath to allow proper airflow, and steer clear of dead corners where stale air might settle. The SGP40 sensor is similarly sensitive to temperature fluctuations, making it essential to maintain a controlled indoor environment for reliable performance.
Incorporate side vents or a perforated front cover to provide low-resistance pathways for air, protecting the electronics while maintaining good airflow. A thoughtfully designed layout ensures sensors are exposed to representative air samples, not warm pockets or obstructed spaces, resulting in more accurate and reliable measurements.